ACC
ACC Certificate Upload
Uploading your ACC Digital Certificate allows you to submit ACC18 Medical Certificates directly to ACC.
Register for an ACC Digital Certificate
- Complete the application forms with ACC
- You will receive your certificate via courier on a flash drive from Healthlink.
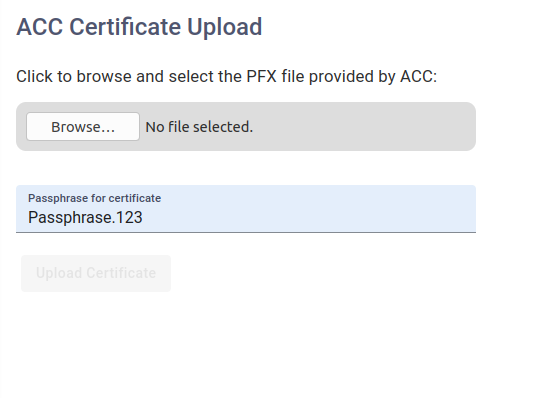
Upload your ACC Digital Certificate
- Click on Admin, then choose ACC Certificate on the left
-
Click and select the pfx file from your flash drive. Tip: The pfx filename usually starts with your name, and is followed by a random number eg
John Doctor_91324675 -
Enter your passphrase provided by Healthlink. If you don't have it, call Healthlink on 0800 288 887
- Click . All going well you will now be able to submit ACC18 Medical Certificates
Reminder
Digital certificates expire after 1 year. Remember to upload the new certificate when it arrives. If your certificate is expired, the expiry date will appear in red.
ACC18 Settings
Phase 1 – Admin Setup (Coming Soon...)
HPI
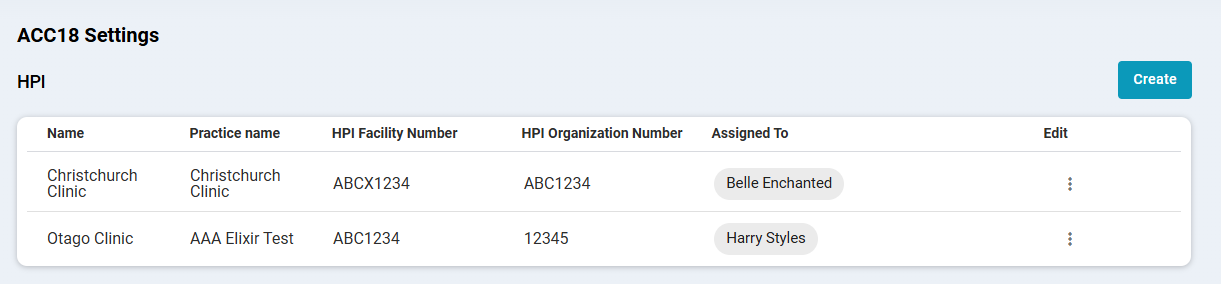 If your clinic has more than one Facility ID, you can add additional ones in this section.
1 - Click Add.
2 - Enter a Name, HPI Number, Facility ID, and Organisation Number.
3 - Select the users who are associated with this HPI record.
4 - Click Create.
ARTP Settings
Phase 1 – Admin Setup (Coming Soon...)
Lead Suppliers
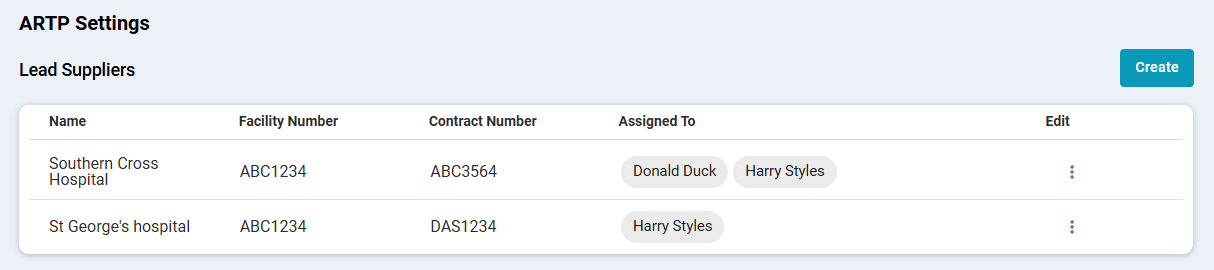 If a doctor has more than one Lead Supplier, you can add them here under different doctors.
-
Click Create.
-
Enter the Lead Supplier details: Name, Facility Number and Contract Number, and select the associated doctor/s.
-
Click Create to save.
Once added, these Lead Suppliers will appear in a dropdown when generating an ARTP form.
Vendors
 If clinic has multiple Vendors, you can add them here.
-
Click Create.
-
Enter the Vendor details and select the associated doctors.
-
Click Create to save.
-
Once added, these Vendors will appear in a dropdown when generating ARTP forms.
Reminder
In this first phase, only the Admin section needs to be completed. There is no relation to user settings or ARTP settings yet. This phase is just to allow you to add and complete the records. In the second phase, you will be able to map these entries to the relevant fields and link them properly.
ACC Invoicing Settings
This section allows you to configure how consultants are linked to ACC for invoicing.
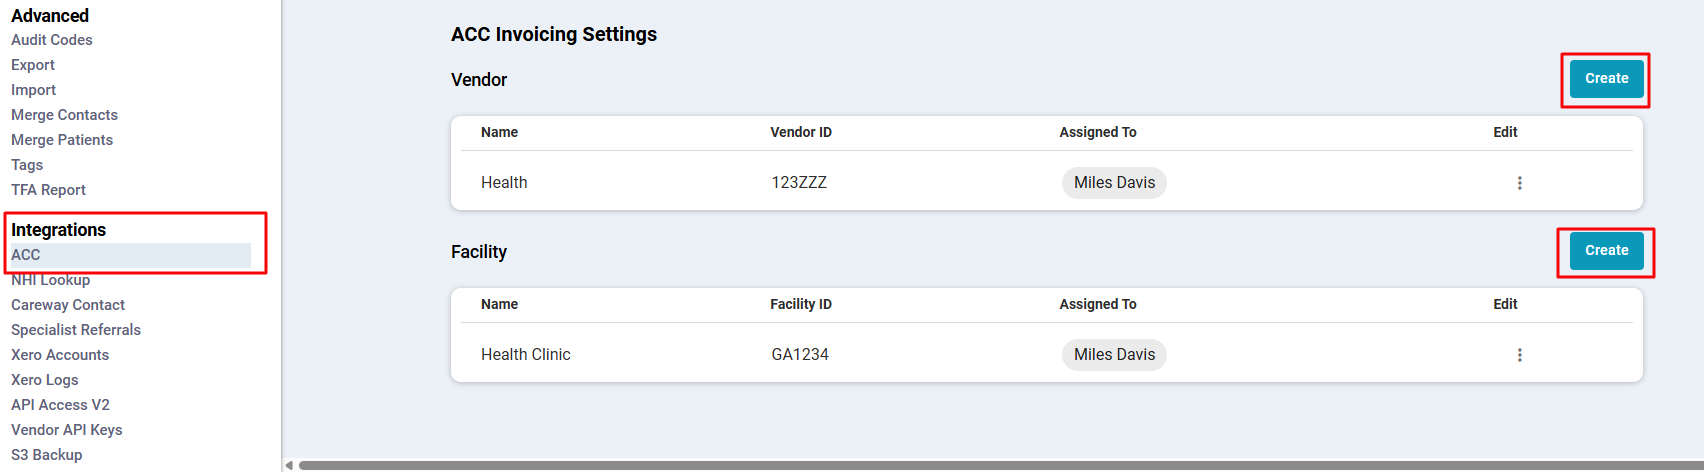
Facility ID
The Facility ID identifies your organisation with ACC. All ACC invoices submitted from your account will be linked to this Facility ID
- If all consultants share the same Facility ID, you only need to create one and assign all consultants to it
- If consultants belong to different facilities, create multiple Facility IDs and assign consultants accordingly
Steps:
- Click Create.
- Enter the Facility details and select the associated consultants.
- Click Create to save.
Vendor ID
The Vendor ID is a unique identifier used to distinguish each consultant in the system for ACC billing purposes.
- Click Create.
- Enter the Vendor details and select the associated consultants.
- Click Create to save.
Reminder
For ACC submissions, you need to set up your Facility ID and Vendor ID in this panel, it’s NOT currently being pulled from Team or User Settings. Make sure it’s correctly configured before submitting invoices, as ACC requires it.